If a dedicated graphics card is installed on your computer, it is generally recommended that you plug your monitor into the graphics card instead of the motherboard. This is because the graphics card is designed to handle graphics-intensive tasks. Plugging your monitor into the graphics card can help you get the best possible performance and visual quality from your computer.
In contrast, if you are using the integrated graphics processor that is built into your motherboard, then you will need to plug your monitor into the motherboard. However, integrated graphics processors are typically less powerful than dedicated graphics cards, so you may not get the same level of performance or visual quality as you would with a graphics card.
Key Takeaways
- If a dedicated graphics card is installed on your computer, it is recommended to connect the monitor to the graphics card instead of the motherboard for better performance and visual quality.
- If using the integrated graphics processor on the motherboard, connect the monitor to the motherboard instead.
- To connect a monitor to a graphics card or motherboard, ensure the appropriate cable is used and the monitor and computer are properly set up in the display settings.
Connecting Monitor to a Graphics Card
A dedicated graphics card might offer better display quality and performance than an integrated graphics processor on a motherboard.
-
Ensure your computer has a suitable graphics card and the card has the right connectors for your display to connect a monitor.
-
A cable must be connected between the graphics card and the monitor.
-
Your operating system’s display settings must be changed to connect a monitor.
How to Plug a Monitor Into a Graphics Card?
To plug a monitor into a graphics card, follow these steps:
-
Access the graphics card on your computer. It will be a separate component that is usually installed in a PCIe slot on the motherboard.
-
Find the video output ports on your graphics card. These are usually located on the back of the card, near the metal bracket that secures it to the case. Typical video output ports include HDMI, DisplayPort, and DVI.
-
Choose the appropriate cable to connect your monitor to the graphics card. For example, if your graphics card has an HDMI port and your monitor also has an HDMI port, you will need an HDMI cable. Make sure the cable is long enough to reach from the graphics card to your monitor.
-
Plug one side of the cable into the video output port on the graphics card.
-
Plug the other side of the cable into the corresponding video input port on your monitor. Ensure the cable is appropriately plugged in on both ends.
Advantages
-
Higher resolutions, more even refresh rates, and precise color reproduction should be possible using a dedicated graphics card.
-
Since graphics cards have processing power and memory, they may operate more quickly in demanding activities like gaming or video editing.
-
Graphics cards often support various displays, including those with high resolutions, quick refresh rates, and numerous monitors.
-
With a graphics card, you can upgrade to a better model to enhance compatibility, performance, or display quality.
In conclusion, enhanced display quality, improved performance, compatibility, and increased flexibility are all benefits of using a dedicated graphics card with a monitor.
Connecting Monitor to a Motherboard
The motherboard’s internal graphics processor may be connected to your display for a simple, low-cost, low-power computing solution.
-
Finding the correct port on the motherboard for the cable you are using and connecting it to the motherboard.
-
The displays are the only steps required to connect a monitor to a motherboard.
-
The monitor may need to be set up with the appropriate display settings to ensure it operates properly.
How to Plug a Monitor Into a Motherboard
To connect a monitor to a motherboard, follow these steps:
-
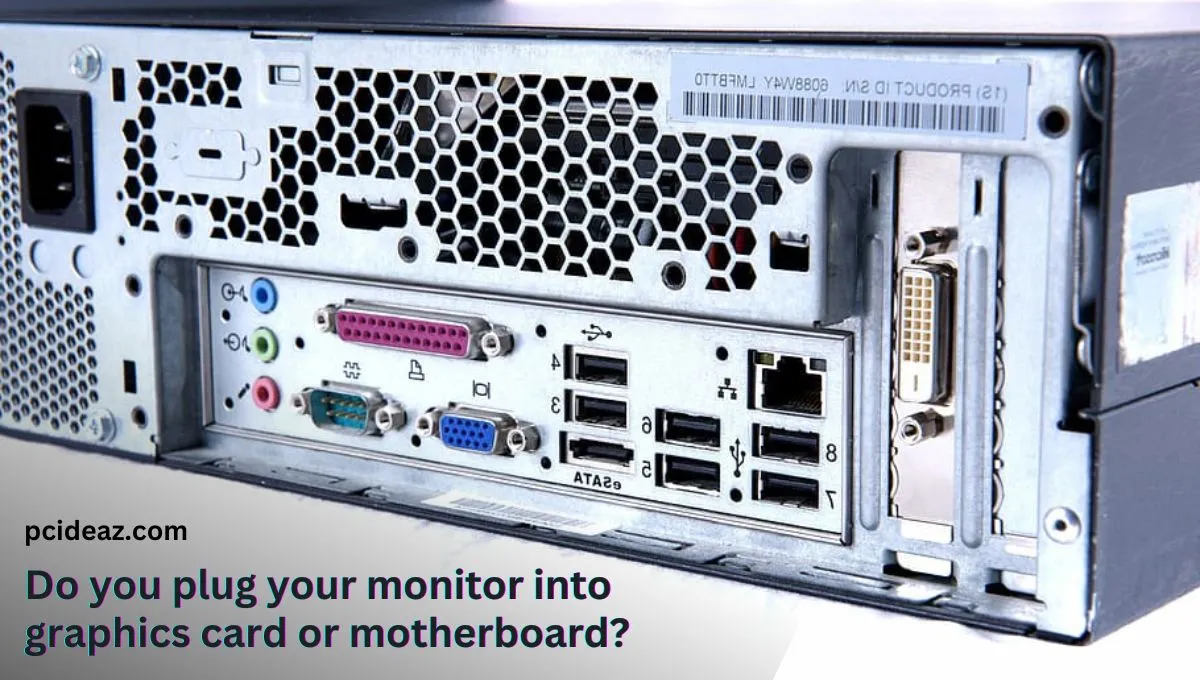
Determine what type of video output connectors are available on your motherboard. Most modern motherboards have at least one of the following video output connectors: VGA, DVI, HDMI, or DisplayPort.
-
Check what type of video input connector your monitor supports. Most monitors have one or more of the same types of connectors mentioned above.
-
Connect one end of the appropriate video cable to the video output connector on your motherboard.
-
Connect the other side of the video cable to the video input connector on your monitor.
-
Turn on your computer and monitor. The monitor should automatically detect the input signal and display the image from your computer.
Note: If you are using a discrete graphics card instead of the integrated graphics on your motherboard, you should connect your monitor to the graphics card instead of the motherboard. This will ensure that you are using the more powerful graphics card instead of the integrated graphics.
Advantages
-
Using the motherboard’s integrated graphics processor is a more affordable option than buying a dedicated graphics card.
-
Only a cable is needed to connect a monitor to a motherboard; no additional hardware is needed.
-
The integrated graphics processor uses less power than a separate graphics card, making it a more energy-efficient option.
-
A simple, low-power, affordable approach for basic computing requirements is to link a monitor to the motherboard’s built-in graphics processor.